Zigbee Coordinator
For Zigbee devices to communicate with Home Assistant, we need a Zigbee coordinator. The one I used is GoControl CECOMINOD016164 HUSBZB-1 USB Hub. Also, to control the devices, we can use the Zigbee Home Automation integration.
First, connect it to the Raspberry Pi device where the Home Assistant instance runs, and configure it in the following way. From the Home Assistant front page, go to Configuration and then select Integrations from the list. Next, use the plus button in the bottom right to add a new integration called Zigbee Home Automation by searching the name and clicking it. In the popup, choose the serial device path and submit. There might be more than one option, and you might have to try them one by one utill one is found to work. Then you can set up the area of the Zigbee coordinator and the devices it discovers, such as the eWeLink in my house.
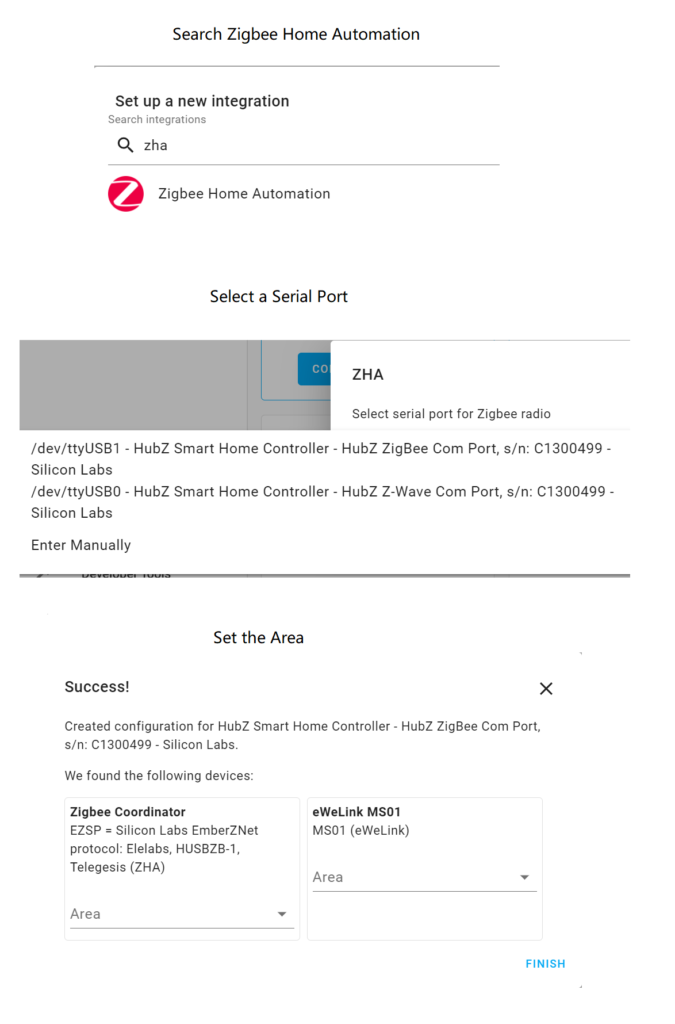
To add Zigbee devices, simply put the devices into pairing mode (different devices might have different ways to set pairing mode), and in Zigbee Home Automation, click add devices button to search for the devices. Once the devices are discovered, configure them properly. For example, change their entity ID and friendly name.
Sensors
- Motion sensor: I am using a Sonoff SNZB-03 Zigbee motion sensor, which works well with my Zigbee coordinator and Home Assistant.
- Temperature sensor: I am using a Xiaomi Aqara temperature and humidity sensor. To put it into pairing mode, simply hold the button on the sensor for about five seconds.
Lighting
One light device that I tested is the Philips Hue Go (with bluetooth). It supports ZigBee protocol and can be recognized by the Zigbee Home Automation integration. For this, it needs to be factory reset via the Philips Hue mobile app. After reset, go to Configuration -> Integrations -> Zigbee Home Automation -> Add Devices and the Philips Hue Go shall be discovered. Configure the Philips device properly; for example, change its entity ID according to the format light.NAME_ROOM_FLOOR, such as light.hue_go_master_room, or simply light.light_master_room, if it is placed inside the master room.
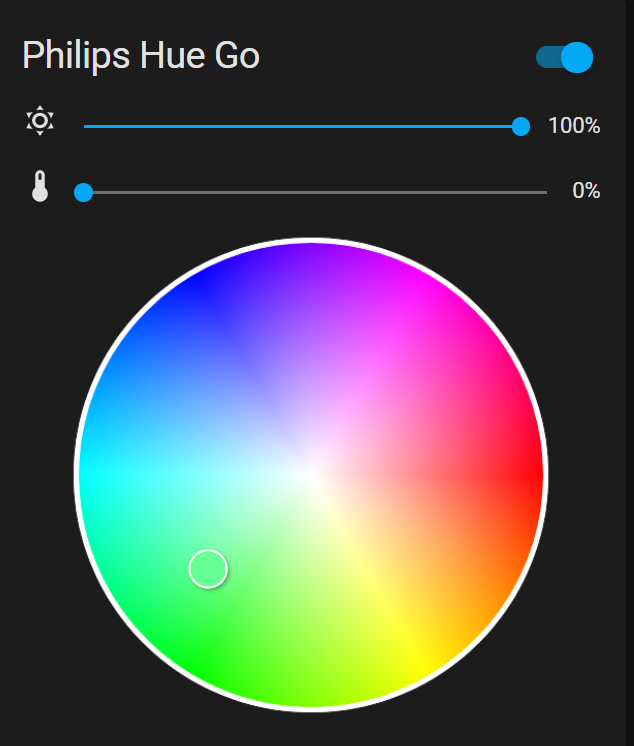
To control Philips Hue Go, including changing its color, we can use the Light Entity Card available from HACS. Simply go to HACS -> Frontend -> Explore and Add Repositories, search Light Entity Card, and install it. After that, go to Overview (Love Place), start to edit dashboard, add Custom: Light Entity Card. In the Card Configuration popup, providing the following:
- Header: a description for the card, e.g., Philips Hue Go
- Entity: choose the Philips Hue Go entity
- Other checkbox options: simply check those what you want/need
After saving the card, we can see the following card in the love place.
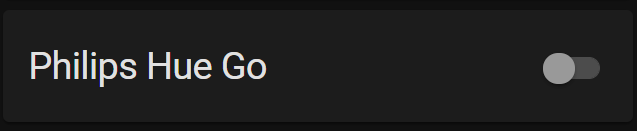
Toggle the icon to turn on the Philips Hue Go and we can see the following color wheel for changing the color of the light.