After a machine dedicated to Home Assistant starts to break down, I look for a new home for my Home Assistant system. As I have a Ubuntu server running various service, I decide to host Home Assistant in a virtual machine running on top of the Ubuntu server. After a few hours of error and trial, I finally manage to migrate my existing Home Assistant system to the virtual machine. Below are the steps I take via connecting to the Ubuntu server with GUI. Note that I tried connection via VNC but encountered some permission issues.
Set Up Bridge Connection
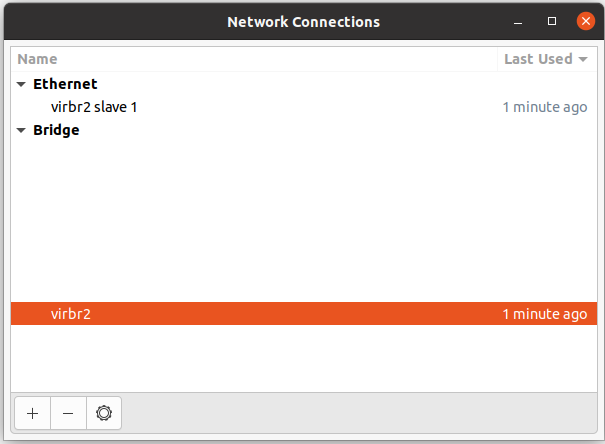
As I want to place the Home Assistant system in the same local network of other devices in my home, I need to set up a bridge connection for the virtual machine to be created later. For this purpose, I tried various methods and found it easiest to utilise the nm-connection-editor, a GUI tool for configuring networks in Ubuntu. Below I attach a few screenshots after a bridge called virbr2 is created.
I assume the Ubuntu machine is connected to LAN via an Ethernet card with network interface called eth0. Your system may have a different name or connection method.
To create the bridge, simply click the + button at the bottom right.
- In the General tab, enable “Connect automatically with priority” and “All users may connect to this network” options.
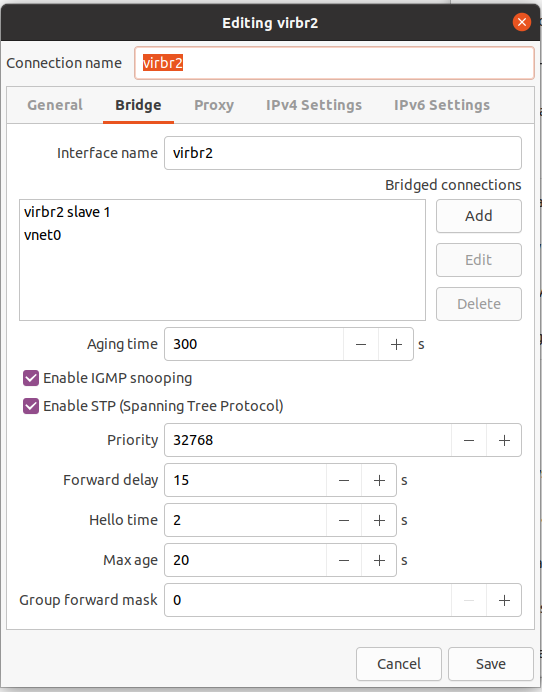
- In the Bridge tab of the popup window, specify the connection name and interface name; both can be set to the same name, e.g., virbr2. Click the “Add” button on the right to add a bridged connection. From the further popup window, select Ethernet, and then select your physical ethernet interface (e.g., eth0).
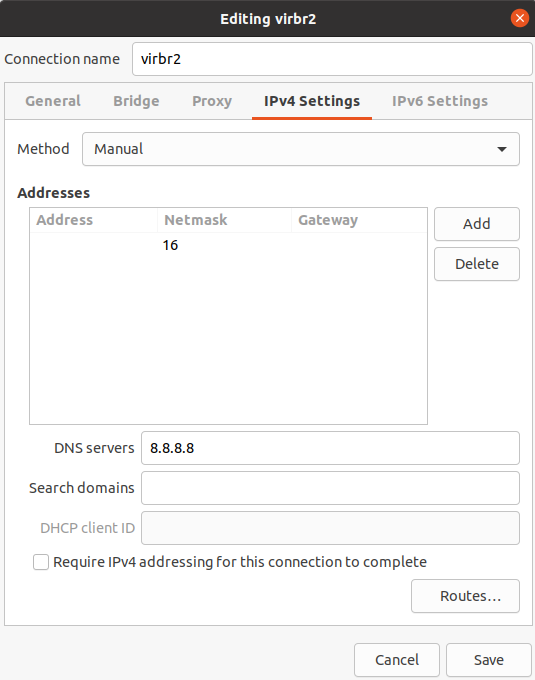
- In the IPv4 tab, set it to DHCP (if the eth0 is in DHCP) or manually set the IP address and gateway that is identical to eth0. Set the DNS server to 8.8.8.8 optionally.
Leave other configurations intact. Note that in the screenshots below, the “virbr2 slave 1” is automatically created. After that, save the bridge we just created.
Then, remove the current connection of the Ubuntu server corresponding to eth0 (e.g., wired connection 1). This step is important; otherwise, the bridge virbr2 may not be activated and we may encounter problems when start the Home Assistant system in virtual machine.
Finally, check the bridge virbr2 is up by using nmcli or ifconfig command.
Create a KVM Machine
For this, I utilise the Virtual Machine Manager tool available in Ubuntu. First, make the bridge virbr2 we just created available to KVM by going to the the menu Edit -> Connection Details. Click the + button on the bottom right of the popup window, go to the XML tab, and provide the following XML snippet and save it:
<network connections="1">
    <name>virbr2</name>
    <forward mode="bridge"/>
    <bridge name="virbr2"/>
</network>
If you find that the XML editing mode is not enable, go to do that by navigating to the menu Edit -> Preferences.
Then follow the instructions in the tab “KVM (virt-manager)” of https://www.home-assistant.io/installation/linux/ to create the virtual machine, where we
- select virbr2 as the bridge.
- enable “start the machine when host boot”.
- set the model to “virtio”.
- add a USB device (e.g., a zigbee dongle) to the machine.
Now, we can start the machine and load Home Assistant. After fully loaded, we may also change the IP address of Home Assistant (which is different from the bridge IP address), by using the following command in ha command lines, where eth0 needs to be changed accordingly. Make sure the new address is in the same network of virbr2 and use the same gateway as virbr2.
# check the network info and interface info
network info

# change IP address
network update eth0 --ipv4-method static
network update eth0 --ipv4-address xxx.xxx.xxx.xxx
network update eth0 --ipv4-gateway xxx.xxx.xxx.xxx